Ground anchors are simple in idea but powerful in effect. Whether you are securing a retaining wall, stabilizing a utility pole, anchoring a tent, or protecting a slope, the right ground anchors keep structures safe and stable. This article explains what ground anchors are, how they work, which types are best for different jobs, step-by-step installation guidance, safety and maintenance tips, and the cost factors you should expect. The language is straightforward, and the explanations avoid technical overload so homeowners, contractors, and curious readers can understand and apply the information.
What are ground anchors and why they matter
Ground anchors are devices inserted into soil or rock to provide resistance to movement. They transfer load from a structure into the ground so that the structure remains in place under tension, compression, or shear forces. The principle is simple: connect a structure to a firmly fixed point in the ground. The result is dramatically increased stability compared to relying on surface weight alone.
The practical importance of ground anchors becomes clear in many everyday situations. A retaining wall without adequate anchoring can bulge or collapse over time. A tall sign or a light pole can lean under wind loads if not anchored properly. Temporary structures like event tents or scaffolding need reliable anchors to protect people and property. Even landscaping elements such as pergolas and fences benefit from the added security ground anchors provide.
How ground anchors work: the mechanics in plain language
At the most basic level, a ground anchor has three parts: a head or connection point where the load is attached, a shaft or tendon that travels through the soil, and an anchoring element at the far end that grips the surrounding material. When tension is applied at the head, the load is transferred down the tendon to the anchoring element, which resists movement by friction, bearing, and sometimes by expanding against the surrounding soil.
Soil type plays a major role in anchor performance. Dense, compact soils and rock offer high bearing resistance, allowing smaller anchors to hold large loads. Loose, sandy, or heavily fractured soils offer less resistance, often requiring longer anchors, larger anchoring elements, or a greater number of anchors. Engineers evaluate soil conditions to design anchors that meet safety factors for the expected loads.
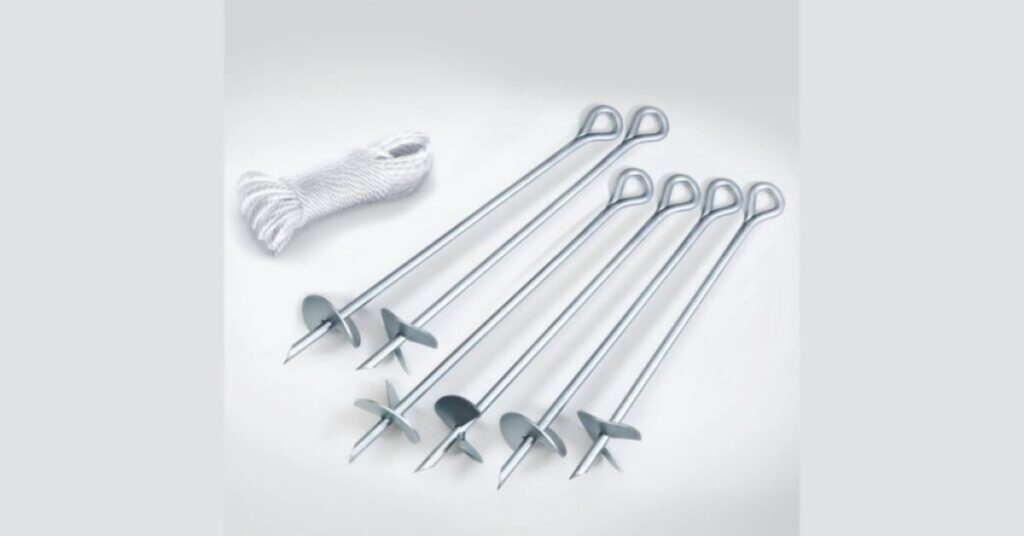
Types of ground anchors and typical uses
There are many styles of ground anchors, each suited to particular conditions and loads. The table below summarizes common types and typical applications.
| Anchor Type | How it holds | Typical uses |
|---|---|---|
| Helical (screw) anchor | Coils into soil; holds by shear along helix surfaces | Light structural anchors, fences, solar mounts |
| Driven rod anchor | Steel rod driven into firm strata | Utility poles, signs, small retaining walls |
| Grouted anchor | Tendon placed and grout injected to form a bonded zone | Large retaining walls, bridge abutments, slope stabilization |
| Plate or buried anchor | Plate or plate assembly set in a cavity or driven; holds by bearing | Heavy civil works, large loads |
| Expanding anchor | Mechanical expansion against surrounding soil/rock | Temporary anchors, smaller loads, some rock anchors |
| Deadman anchor | Mass (log, concrete block) buried and tied to structure | Temporary works, emergency anchors, light landscaping |
Each of these ground anchors has advantages and trade-offs. Helical anchors are quick to install and ideal for many residential jobs because they can be screwed in by machine or even by hand for smaller sizes. Grouted anchors carry the highest loads and are common in major civil works, but they require drilling and careful installation. Driven rod anchors are fast and reliable where a competent layer is reachable by pounding the rod into place.
Choosing an anchor based on soil and load
Selecting the correct ground anchors depends on what you are anchoring and the ground conditions. For a lightweight garden pergola in cohesive clay, a short helical anchor may be enough. For a 3-meter retaining wall on sloping ground with loose fill, grouted anchors or plate anchors that bear on deeper, denser layers will usually be needed. If the site is rocky, mechanical or rock-specific anchors that expand in boreholes provide secure anchorage.
When in doubt, a simple site test or geotechnical consultation will save time and money. A soil test can reveal bearing layers, groundwater depth, and whether corrosion or freeze-thaw cycles could affect anchor longevity.
And before you go, be sure to read through some of our other helpful posts!
Step-by-step installation process for common ground anchors
Installation steps vary with anchor type, but the general approach follows predictable stages: site preparation, setting or installing the anchor, tensioning and testing, and protecting the anchor for long-term service.
Begin with site preparation. Remove vegetation, debris, and any obstructions. Mark anchor locations according to the design or spacing guidelines for your application. Check for buried utilities before any drilling or driving; calling the local utility marking service is essential to avoid damaging pipes and cables.
Next, install the anchor. For helical anchors, attach the appropriate head and twist the anchor into the ground until designed depth or torque is reached. For grouted anchors, drill a borehole to specified depth, insert the tendon or reinforcement, pump grout into the hole from bottom-up to ensure full bonding, and allow it to cure before applying load. For driven rod anchors, use a pile driver or hammer to drive the rod to depth or pile refusal.
After installation, anchor heads are typically tensioned to the required load. Tensioning may be achieved by mechanical jacks for grouted or plate anchors, or by tightening connections for smaller driven anchors. Testing the anchor is a critical stage: a pullout test or proof load test confirms the anchor performs to specification. Documentation of test loads and results is good practice and often required for larger projects.
Finally, protect the anchor. Leave head connections accessible if periodic inspection or retensioning is expected. For permanent anchors, protect exposed steel with coatings or grout and ensure drainage around the anchor to prevent corrosion. Cover or conceal anchor heads for aesthetics while ensuring they remain serviceable.
Installation example: stepwise narrative for a helical ground anchor
Imagine you need to anchor a small retaining wall with helical ground anchors. First, you clear the base area and mark where each anchor will go. Then you choose helical anchors sized for the wall height and expected uplift. Using a small hydraulic torque motor, you attach the anchor shaft and begin turning it into the ground. You monitor torque and depth; when the target torque or depth is reached, you stop. The next step is to attach a connector plate to the anchor head and pull the anchor to the design tension using a hydraulic jack. A simple proof test is performed by applying a known load and measuring movement. If movement is within acceptable limits, you secure the connector and backfill. The wall is now tied back to sound ground and ready for finishing.
Common mistakes to avoid with ground anchors
A frequent error is underestimating soil variability. A site may have alternating bands of soft fill and dense native soil, and an anchor that works in one spot may fail nearby. Another mistake is skipping proof testing; untested anchors introduce risk because installation conditions are rarely identical to assumptions. Overloading small anchors or using anchors with incompatible materials in corrosive soils can shorten service life. Finally, failing to protect anchor heads or leaving them exposed to mechanical damage or weather often leads to early failure.
Maintenance and inspection of ground anchors
Ground anchors are not “install and forget” elements. Regular inspection ensures long-term performance. Check anchors annually or after major events such as storms or earthquakes. Look for signs of corrosion on exposed steel, unexpected movement or slack in connections, and soil erosion around anchor heads. If tension has relaxed, retensioning may be necessary. For grouted anchors, small surface cracks in grout should be repaired to prevent water ingress and corrosion. Keep thorough records of inspections, tensions, and any repairs; this history guides future maintenance and provides proof of diligence for safety-critical installations.
Maintenance intervals depend on environment. In coastal or chemically aggressive soils, inspect more frequently and consider sacrificial coatings, cathodic protection, or use of stainless or galvanized materials to extend life.
Cost considerations and budgeting for anchors
The price of ground anchors varies widely based on type, size, depth, and site conditions. Small helical anchors for light structures are relatively inexpensive and quick to install, making them cost-effective for many residential projects. Grouted or large plate anchors are more costly because they require drilling, larger crews, and testing. Hidden costs include mobilization of equipment, site preparation, utility location, testing labor, and protective coatings or covers. A realistic budget should include contingency for unforeseen subsurface conditions uncovered during installation.
A typical homeowner project using several helical anchors might allocate a modest budget. In contrast, a civil engineering project involving dozens of grouted anchors tied to a large retaining structure will see a significantly higher per-anchor cost due to testing and quality control needs.
Environmental and regulatory considerations
Local building codes and regulations may require specific anchor types, testing, or certification for certain structures. Permit requirements vary; for example, anchoring a permanent retaining wall may need engineering approval and inspection. Environmental regulations may restrict drilling or disturbance in sensitive areas. Always check local codes before installing anchors. Additionally, consider the environmental impact of materials and disposal of grout or drilling slurry. Choose corrosion-resistant materials where needed to avoid contamination and premature failure.
Quick reference list: when to choose each anchor type
- Choose helical anchors when you need quick installation for light to moderate loads, and soil conditions are reasonably consistent.
- Choose driven rod anchors when competent strata are accessible by driving and rapid installation is required.
- Choose grouted anchors when high loads, long-term performance, and precise capacity are critical, particularly in civil and structural applications.
- Choose plate or buried anchors when large bearing area is needed for heavy loads and space permits excavation or installation.
- Choose expanding or mechanical anchors for temporary works or when a simple, non-grouted solution suits rock or competent media.
- Use deadman anchors for emergency or temporary needs where a buried mass is the simplest available solution.
These guidance statements help narrow choices, but a site-specific assessment will always improve the final selection.
Table: Installation checklist for ground anchors
| Stage | Key actions |
|---|---|
| Planning | Mark locations, check utilities, select anchor type and size, obtain permits |
| Preparation | Clear site, level area, gather tools and safety equipment |
| Installation | Drill, drive, or screw anchor; achieve design depth/torque; grout if required |
| Testing | Perform proof load or pullout test; record results and adjust as needed |
| Protection | Coat exposed metal, backfill, install drainage if needed |
| Maintenance | Inspect regularly, retension if necessary, repair corrosion or grout defects |
This table summarizes the major phases and the most important actions to consider during an anchoring project.
Closing thoughts
Understanding ground anchors and how they interact with soil is essential for anyone planning to stabilize structures or secure loads. The right choice saves money, reduces risk, and extends the life of your installations. Whether you are a homeowner tackling a DIY retaining wall, a contractor managing a small build, or a civil engineer designing a large structure, the fundamentals are the same: match anchor type to soil and load, install carefully, test and document performance, and maintain over time.
If you are about to start a project that depends on ground anchors, take time to verify site conditions, check regulations, and plan for proper installation and inspection. The time spent planning and testing pays back many times over in reliability and peace of mind. Ground anchors are a small part of a project in terms of visibility, yet they often make the biggest difference in long-term success.
Frequently asked questions about ground anchors
What is a ground anchor and how does it differ from a simple stake?
A ground anchor is a designed device installed to resist significant loads through deep soil or rock engagement and often includes engineered elements such as helices, grout bonds, or buried plates. A simple stake provides only shallow resistance and is suitable for light temporary loads.
What is the best ground anchor for coastal locations?
In coastal locations with high corrosion risk, helical anchors made of corrosion-resistant steel or anchors with protective grout and coatings are recommended. Material selection and additional protective measures are important because salt-laden environments accelerate corrosion.
What is involved in testing a ground anchor after installation?
Testing usually involves applying a measured load to the anchor head and recording displacement. A proof load test may load the anchor to a specified percentage of design capacity to verify performance. Results are documented and compared to allowable movement criteria.
What is expected lifespan of ground anchors?
Lifespan depends on materials, soil chemistry, mechanical protection, and maintenance. Properly selected and protected anchors in benign soils can last decades. In aggressive soils, life can be shorter unless additional corrosion protection measures are used.
What is the role of soil tests in anchor selection?
Soil tests reveal bearing layers, groundwater depth, and strength characteristics. These inputs determine anchor length, type, and required installation method. Without soil data, anchors can be under-designed or unnecessarily expensive.
What is the safest way to choose an anchor for a retaining wall?
The safest approach is to consult a geotechnical or structural engineer who can evaluate soil data, wall geometry, loads, and local conditions. An engineered solution tailored to the specific site provides the best combination of safety and economy.